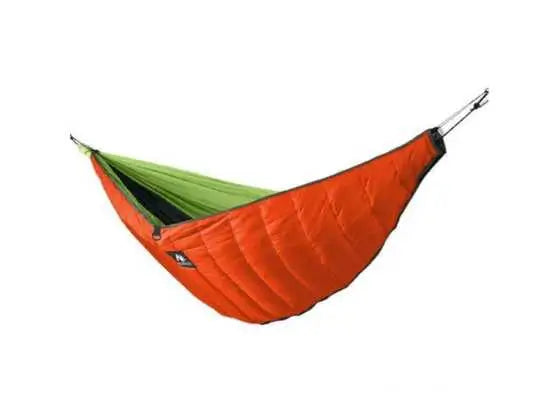
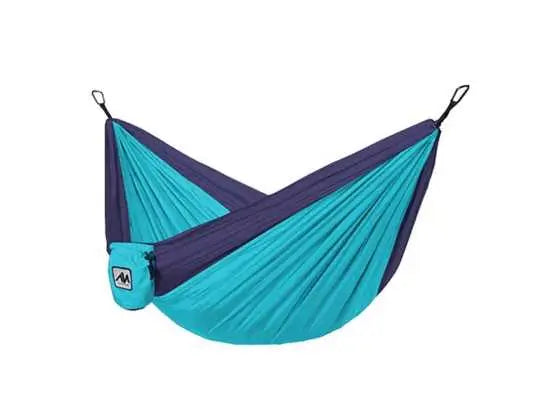
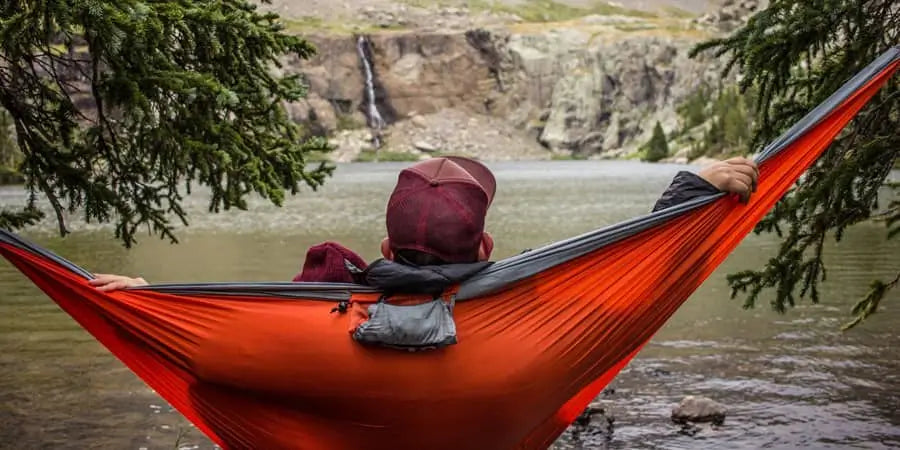
For many hammock camping is the most comfortable way to camp. It’s no surprise then it’s growing in popularity, some even opting to sleep in a hammock at home. For one it gets you up off the ground to keep you clean and dry. You lay in a comfortable position that doesn't strain your back like on a hard and possibly uneven ground, and second you can do it anywhere you can find two trees. Hammock camping can be pretty economical to get started with, and doesn’t require too much gear. On a warm summer night all you need is a hammock, some tree straps, your sleeping bag (optional) and maybe a mosquito net. The great thing about hammock camping in the summer is it requires less gear than a full tent set up, and as a bonus you get an awesome view of the night sky as you lay comfortably in your hammock. When cooler weather creeps in you will need to add a tarp to keep the rain out and block the wind, and also an under quilt (UQ) for warmth. An under quilt is like a sleeping bag for the bottom of your hammock. As the wind blows across the bottom of the hammock you’ll develop something called Cold Butt Syndrome (CBS). An under quilt hung below but close to the hammock helps to insulate you while you sleep by blocking the wind, and by creating a layer of warmer air between you and the ground. This is similar to using an insulated sleeping pad when in a tent. However, you aren’t stuck trying to stay on a tiny mat, on the hard ground. When you aren’t sleeping your hammock can double as a swing chair. Often a hammock set up for one can weigh less and be less costly than a tent set up.
What Gear Do I Need to Hammock Camp?
The general set up is a hammock, tree straps for ease of hanging and mostly to protect the tree, and a sleeping bag. From there you can accessorize depending on the weather. You can actually get into hammock camping quite modestly, but of course with all camping and backpacking gear, you can also spend thousands cutting grams to get the lightest set up. In this article I’m going to cover the basics, layout some good quality gear, at an affordable price, that will get you out on the trails immediately.
Summer:

On a warm summer night you likely won’t need more than the three basic items listed above.
However if you are expecting bugs, you may want to add a mosquito net, some hammocks will come with this like an anti-mosquito hammock, and others will offer it as an add on option. If you are expecting rain then you will want to add a tarp to your hammock gear. And if lounging outdoors during the day is your favorite pass time there are even hammocks available with a built in sunshade. There are multiple set ups available to suit your needs and wants.
Spring & Fall:

With cooler and unpredictable weather you’ll want to add to the basic three. You will need a tarp for rain, and an under quilt for warmth. The tarp can be configured in a number of ways to keep you dry while you sleep, lounge, or even cook. Cooking in your tent is not advised when you’ve been relegated to the tent due to rain, but with a hammock and the tarp set up you can put the tarp in porch mode and cook with no worry of cooking in an enclosed space. The UQ as explained above will help keep you warm when the temperature dips down lower. Some may serve you well into mild winter weather. An UQ is a very important part of your set up in colder weather and is preferable to using a sleeping pad which may shift under you at night, exposing your head, shoulders or legs to the cold. Nothing ruins a good night of camping like being cold, wet, or both!
Winter:

For winter you will for sure need the added tarp, and under quilt, and you will likely need to use a much warmer sleeping bag, just like you would for winter camping in a tent. Carry a warm zero degree sleeping bag perfect for cold winter camp outs. The key here is to keep everything enclosed. So, setting the tarp closer and enclosing the space will really help to keep you warmer. You most likely will also wear a jacket, warm socks, maybe even a warm winter hat to keep the heat in. It really depends how you do in the cold. A great trick a perpetually cold friend of mine does is to use her bottle as a hot water bottle. She heats up a liter of water before bed, either on the fire or the stove, then carefully pours it into her bottle and tightly secures the top. Then she hops into her hammock and hugs that bottle like a teddy bear. It keeps her warm. You can also toss it in the sleeping bag before you get into the hammock to pre-warm it.
Accessories:

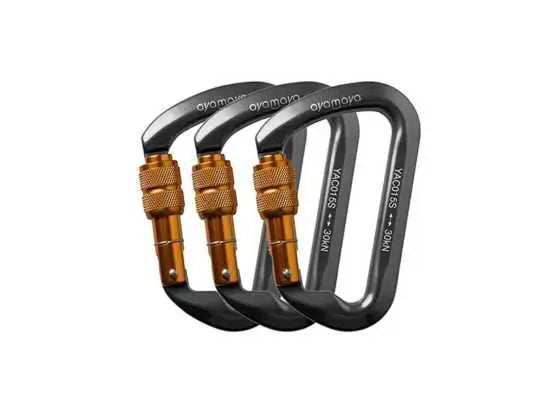
Carabiners - If tying knots is not your strong point investing in a set of strong carabiners is a great idea. You can then simply attach one to each end of your hammock, you will have to learn a suitable knot for this I’d recommend a figure 8 on bight used by rock climbers, and then use the carabiner to attach it to your tree straps. This will make set up and take down very quick and easy.
Tree Straps – While most hammocks come with enough line to tie directly to the tree, we recommend tress straps. It will help protect the tree and many parks require you to use them for hammock camping. Tree straps are webbed material, usually 1-2” wide, anywhere from 10-15 feet long, and feature loops, called daisy chains, along the length that you attach to and can use to adjust the height and angle of your hammock to get that perfect hang. They come in a pack of two, one for each tree. They wrap around the tree, sometimes multiple times for a small tree, and then loop through themselves. You then tie into one of the daisy chain loops along the length, or clip in using a carabiner.
A second set of tree straps can serve as a great gear organizer. You can hang it between two trees and use the loops to hang other gear off of like your water bottle, solar charger, towel, head lamp, etc. The possibilities are endless.
Tensioners - Tensioners are used to increase or decrease the tautness, or tension, on a line, such as a guy-line to your tarp, easily, without the use of knots. They are small, and ideal for lower amounts of tension, under 50lbs, made of aluminum or titanium most commonly
Ridgeline Organizer - You can make or buy a small organizer for your hammock. This hangs on your ridgeline and lets you store inside the hammock, small items like your phone, headlamp, medication, water, etc. which are then easily accessible. This will save you having to get out of the hammock to grab these items in the middle of the night. All Ayamaya hammock feature a small pocket on the outside for storage, but if you need extra, look for a separate ridgeline organizer.
Pillows - Some people like to use a pillow while in the hammock. If you’re car camping you can bring your favorite one from home, but if you’re backpacking you’ll want to keep the size and weight to a minimum so an inflatable pillow will provide you with additional head support if you want it. You can inflate it as much or as little as you need to tailor it to your needs.

Media Holders - A number of companies make devices to hold your device so you can lay and watch hands free. Some are an add on accessory to a specific hammock model and others, like the Hangtime Hook, work with all hammocks. It’s an inexpensive and fun little device for watching movies, reading, or flipping through music while lying in your hammock.
From summer to winter, and every season in between, hammock camping is a fun, easy, versatile, and arguably the most comfortable way to sleep outdoors. Be sure to check out the book, for tips and tricks on hanging your hammock, as well as other great info. YouTube is also a great source for learning knots and how to set up your hammock kit, as well as reviews on gear. Now that you’re equipped with all this new knowledge, where will you hang next?

